Are you considering giving your concrete floors a new lease of life? Concrete coating is a popular DIY project that can transform your garage, basement, or outdoor space. However, it’s a task that straddles the line between cost-effectiveness and potential pitfalls. This comprehensive guide will delve into what it takes to coat your concrete floors successfully and whether it’s worth the risk of doing it yourself.
What is Concrete Coating?
Concrete coating is a specialized process that involves applying a protective and often decorative layer over concrete surfaces. This layer, typically made from a variety of materials like epoxy, polyurethane, acrylic, or even a specialized concrete sealant, serves multiple purposes:
Protection: The primary purpose of concrete coatings is to protect the surface from various types of damage. Concrete, though sturdy, is porous and can absorb water, chemicals, and other substances that might lead to deterioration over time. Coatings form a barrier that prevents such absorption, protecting the concrete from stains, moisture damage, and chemical corrosion. In industrial or garage settings, this means resistance to oil spills, chemical leaks, and heavy traffic.
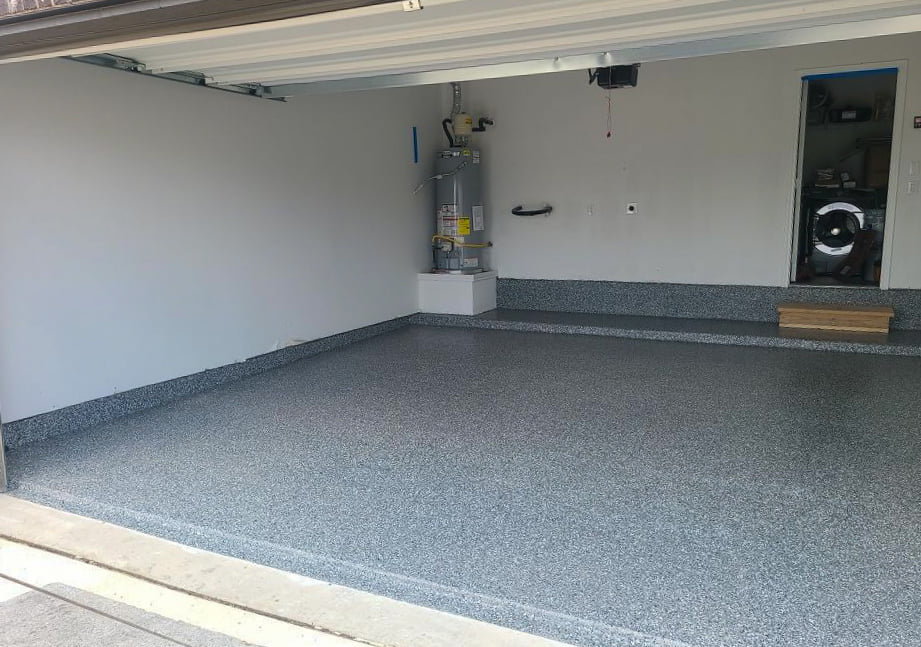
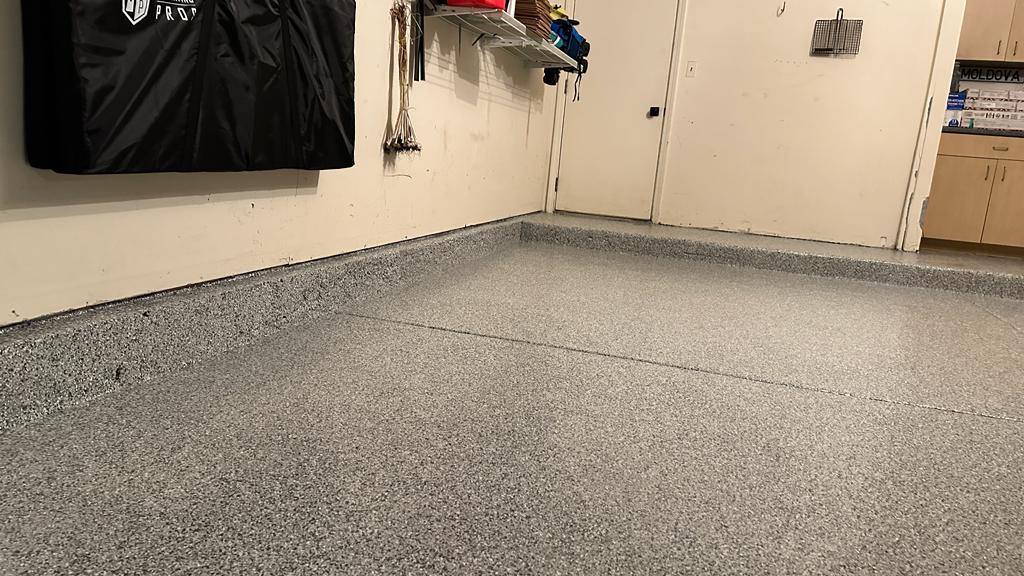
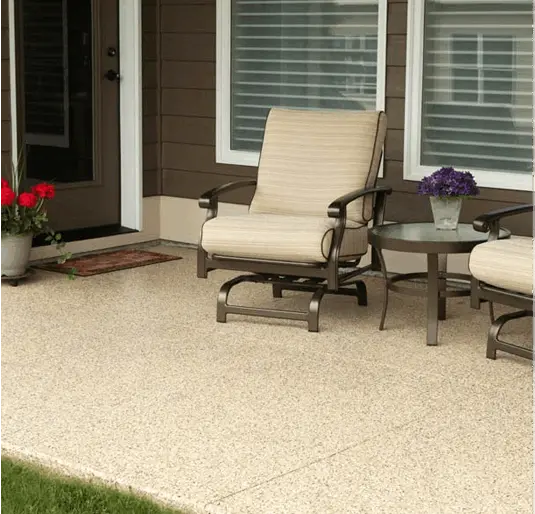
Aesthetics: Concrete coatings can significantly enhance the appearance of concrete floors. They come in various colors and textures, allowing for customization according to personal or business needs. For example, an epoxy coating can be mixed with colored flakes to create a vibrant, multi-hued concrete surface that is visually appealing. This aspect is particularly important in commercial or residential spaces where the appearance of the floor contributes to the overall ambiance.
Maintenance: Coated concrete is easier to clean and maintain. The smooth, non-porous surface can be swept and mopped clean without much effort, unlike uncoated concrete, which may require more rigorous cleaning methods to remove stains or spills.
Safety: Certain types of coatings can be formulated to provide non-slip surfaces. This is crucial in areas where there is a risk of slipping, such as in kitchens, bathrooms, or industrial work areas. The texture added by the coating can increase traction, reducing the risk of accidents.
Longevity: Applying a coating can extend the life of a concrete floor. By protecting it from wear and tear, weather elements, and other damaging factors, the underlying concrete remains intact and in good condition for a longer period. This is a cost-effective measure in the long run, as it delays the need for repairs or replacement of the flooring.
UV Resistance: For outdoor concrete surfaces, certain coatings offer UV protection. This prevents the concrete from fading, yellowing, or degrading due to prolonged exposure to sunlight.
Versatility: Concrete coatings are not limited to floors. They can be applied to walls, ceilings, and other concrete structures where protection and aesthetics are desired.
Types of Concrete Coatings
The choice of concrete coating depends on the specific needs of the surface:
Epoxy Coatings: Known for their durability and strength, epoxy coatings are ideal for garages, warehouses, and industrial settings. They can withstand heavy foot traffic and are resistant to many chemicals.
Polyurethane Coatings: These coatings are more flexible than epoxy, making them suitable for surfaces that experience temperature shifts or slight movements. They are UV-resistant, making them a good choice for outdoor applications.
Acrylic Sealers: Acrylic concrete coatings are often used for decorative purposes. They provide a glossy finish and are available in various colors. While not as durable as epoxy or polyurethane, they are easier to apply and reapply.
Polyaspartic Coatings: A newer type of coating, polyaspartic coatings, cure very quickly and are highly durable. They are becoming popular in commercial settings due to their rapid curing time and long-lasting finish.
Understanding the type of coating and its appropriate application is crucial for achieving the desired results, whether it’s for protection, aesthetics, safety, or a combination of these factors.
Professional vs. DIY Concrete Coatings

When it comes to concrete coatings, the debate between hiring professionals and taking the DIY route is influenced by factors like cost, quality, expertise, and time. Understanding the nuances of both approaches can help you make a decision that suits your needs, budget, and skill level.
Professional Concrete Coatings
Expertise and Experience: Professional contractors bring years of experience and expertise. They’re skilled in surface preparation, application techniques, and dealing with unexpected issues. Their knowledge ensures a uniform application and can significantly enhance the durability and appearance of the coating.
Quality of Materials: Professionals often have access to high-grade, commercial-quality materials that may not be readily available to DIY enthusiasts. These materials can offer better longevity, a more appealing finish, and superior protection.
Efficiency and Time-Saving: Hiring a professional can save a significant amount of time. They can complete the job faster due to their skills and experience, and also because they often work as a team. For those with a busy schedule, this aspect is particularly advantageous.
Longevity and Warranty: Professional work often comes with the assurance of longevity and may include a warranty. This means if the coating fails or shows defects within a certain period, the contractor might repair or redo the work at no additional cost.
Cost: The primary downside of professional services is the cost, which can be substantially higher than doing it yourself. The expense includes labor, materials, and often a markup for the contractor’s services.
Customization and Personal Preferences: While professionals can offer a range of options, some DIY enthusiasts may find the customization options limited compared to doing it themselves, where they can experiment with colors and textures.
DIY Concrete Coatings

Cost-Effective: The most compelling advantage of DIY concrete coatings is the potential savings. You’re essentially cutting out the labor costs and potentially some of the material costs if you choose more budget-friendly options.
Learning and Satisfaction: For those who enjoy home improvement projects, DIY coating provides an opportunity to learn a new skill and the satisfaction of completing a project on your own.
Flexibility and Control: You have complete control over the project, from choosing the type of coating to deciding on the timeline. This can be particularly appealing for those who have specific design ideas or who need to work on the project around a busy schedule.
Potential for Error: Without professional experience, there’s a higher risk of making mistakes. Poor surface preparation, incorrect application, or choosing the wrong materials can lead to subpar results that might require costly repairs or redoing the entire project.
Time and Effort: A DIY project can be time-consuming, especially for those who are new to the process. It requires significant effort, from researching the right materials to the physical task of applying the coating.
Equipment and Safety: Some equipment necessary for the job might need to be purchased or rented, adding to the cost. Additionally, DIYers must be aware of safety precautions, as working with chemicals like epoxy can be hazardous without proper gear and ventilation.
DIY Concrete Coating Process
Required Tools and Materials
You’ll need a concrete cleaner, a degreaser, a power washer, an epoxy or sealant kit, rollers, brushes, a mixing paddle, and safety gear like gloves and goggles.
Step-by-Step Guide to DIY Concrete Coating
Embarking on a DIY concrete coating project can be a rewarding experience if done correctly. This guide provides a comprehensive step-by-step process to ensure you achieve the best possible results.
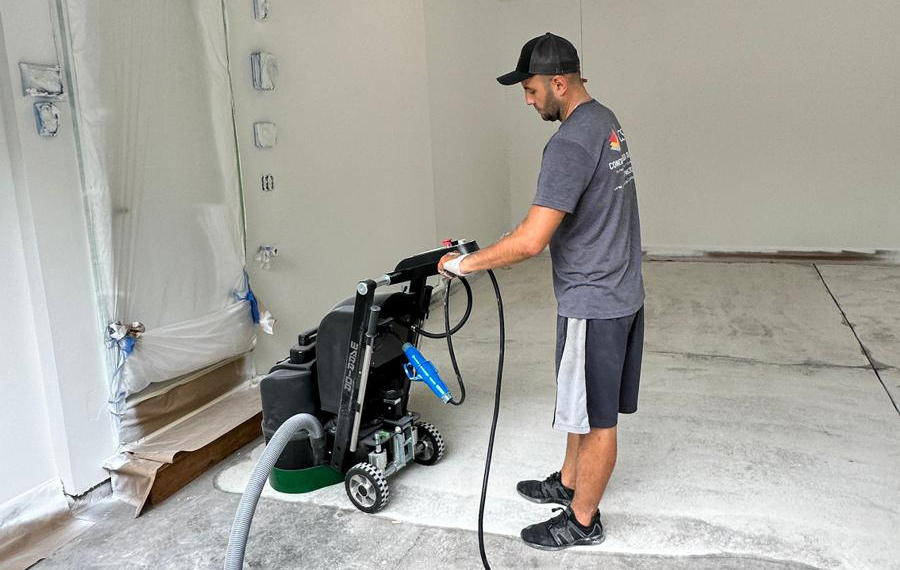
1. Surface Preparation
Cleaning: Begin by thoroughly cleaning the concrete surface. Remove any dirt, grease, or oil stains using a pressure washer or a concrete cleaner and degreaser. This step is crucial, as a clean surface ensures better adhesion of the coating.
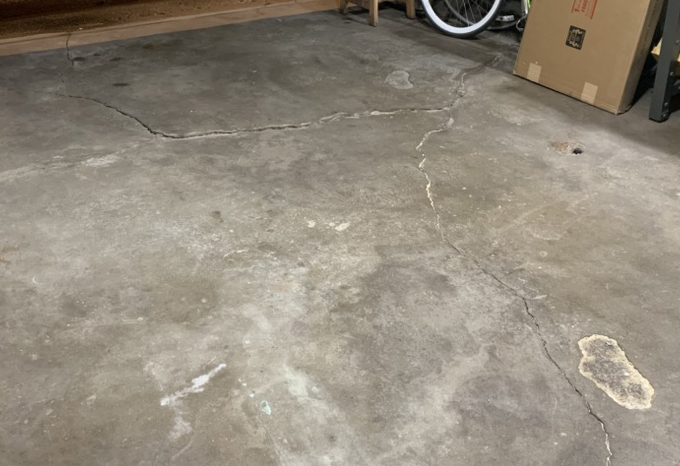
Repairing Cracks and Damage: Inspect the concrete for cracks or damage. Use a concrete patch product to fill any cracks, holes, or uneven areas. Ensure the repair product is completely dry before proceeding.
Etching the Surface: For certain types of coatings, etching the concrete surface is necessary to create a rough profile for better adhesion. This can be done using a commercial etching solution, following the manufacturer’s instructions carefully.
2. Primer Application (If Necessary)
Applying Primer: Not all concrete coatings require a primer, but if yours does, apply it using a roller or brush. Primers can enhance the adhesion and longevity of the coating. Allow the primer to dry as per the product’s instructions.
3. Mixing the Coating
Preparing the Coating: If you’re using a two-component coating like epoxy, mix the resin and hardener as per the instructions. It’s crucial to get the proportions right for the coating to cure properly.
Pot Life: Be aware of the pot life of the mixture – the time you have to use the product before it starts to harden in the container.
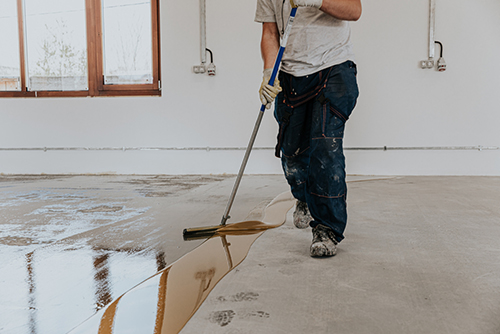
4. Application
Applying the Coating: Use a roller or brush to apply the coating evenly across the surface. Work in manageable sections to maintain a wet edge, ensuring a uniform application. For textures or added grip, you can sprinkle color flakes or a non-slip additive onto the wet coating.
Edges and Corners: Pay special attention to edges and corners, using a brush for precision and to ensure full coverage.
5. Curing Time
Drying Time: Allow the coating to dry according to the manufacturer’s instructions. This can vary from a few hours to a day, depending on the type of coating and environmental conditions.
Curing Time: Full curing, where the coating achieves maximum hardness and is ready for heavy traffic, can take several days. It’s important to wait for the full curing time before putting the coated area into full use.
6. Finishing Touches
Second Coat (If Needed): Depending on the product and desired finish, a second coat may be necessary. Repeat the application process for the second coat, ensuring the first coat is sufficiently dry.
Sealing: Some coatings might require a top sealant for additional protection or gloss. If so, apply the sealant similarly to how you applied the coating.
Tips for Success
Temperature and Humidity: Check the ideal temperature and humidity conditions recommended for the coating. Extreme conditions can affect the drying and curing process.
Ventilation: Ensure proper ventilation in the working area, especially when using products that emit fumes.
Test Small Area: Before starting, test the coating on a small, inconspicuous area to ensure you are satisfied with the appearance and to confirm that the concrete reacts well to the product.
Following these steps carefully will help you achieve a professional-looking finish on your DIY concrete coating project. Remember, preparation is key, and taking your time at each step can significantly impact the quality and longevity of your coating.
Common Mistakes to Avoid
Avoid applying the coating in damp conditions or when temperatures are below 50°F (10°C). Ensure the concrete is free of cracks and repair any damage before coating.
Cost Analysis

Cost Comparison: DIY vs. Professional Coating
The cost for a professional job might range from $6 to $10 per square foot, while DIY can reduce this to about $1 to $4 per square foot. However, factor in the value of your time and potential do-overs.
Long-Term Considerations
A professional job may last longer and include a warranty, while a DIY job might require more frequent touch-ups.
Making the Right Decision
Deciding whether to hire a professional or take on a DIY concrete coating project involves weighing several key factors. This decision can impact not just the cost and outcome of the project, but also its longevity and functionality. Here’s a deeper dive into the considerations to help you make an informed choice.
Assessing Your Skills and Experience
DIY Experience: If you have experience with home improvement projects, particularly those involving painting or flooring, you might be well-equipped to handle a DIY concrete coating project. Familiarity with tools, materials, and processes is crucial.
Learning Curve: For novices, consider the learning curve. Are you willing and able to invest time in researching techniques, understanding materials, and possibly practicing before tackling the actual project?
Understanding the Scope of the Project
Size and Complexity: Evaluate the size and complexity of the area you want to coat. Small, straightforward spaces like a single-car garage might be manageable for a DIY project. Larger areas or those with intricate details might be better suited for professionals.
Desired Finish: Consider the type of finish you want. If you’re aiming for something basic, DIY might suffice. However, for more complex finishes, like multi-colored or patterned surfaces, a professional’s expertise could be invaluable.
Time and Effort Considerations
Project Timeline: Do you have a strict timeline? Professionals can usually complete the job faster than a DIY approach.
Personal Time Investment: Weigh the value of your time. A DIY project can consume many hours over several days, from preparation to application to curing.
Costs
Budgeting: Clearly, DIY can be more cost-effective in terms of labor expenses. However, factor in the cost of materials, equipment rentals, and any learning materials or practice supplies.
Long-Term Value: Consider long-term costs. A professional job might last longer and come with a warranty, potentially saving money on repairs or reapplications in the future.
Risk Assessment
Quality Risks: DIY projects carry the risk of lower-quality finishes, especially if you’re inexperienced. Mistakes can be costly and time-consuming to fix.
Safety Concerns: Be honest about your ability to handle the chemicals and equipment safely. Professionals are trained to manage these risks.
Personal Satisfaction and Customization
Creative Control: DIY projects offer more personalization. You control every aspect, from the color to the texture to the finish.
Sense of Achievement: There’s a unique satisfaction in completing a home improvement project on your own, which is a significant draw for many DIY enthusiasts.
In conclusion, the decision between DIY and hiring a professional for concrete coating comes down to a balance of skill, cost, time, effort, and the quality of the outcome. If you have the time and inclination to learn, a DIY project could be a rewarding and cost-effective choice. However, for guaranteed quality, especially in complex or large-scale projects, professional services are the safer bet. Remember, the right decision is the one that aligns with your personal circumstances, abilities, and expectations.
FAQs
How long does DIY concrete coating last compared to professional work? A professionally applied coating can last up to 10 years, whereas a DIY job might need reapplication every 3-5 years.
Can I apply the concrete coating in any weather? Ideal conditions are mild temperatures (50-80°F) and low humidity. Extreme weather can affect drying and curing.
What are the safety precautions to consider in DIY concrete coating? Use protective clothing, gloves, goggles, and a respirator, especially when working with epoxy.
How do I fix mistakes in DIY concrete coating? Small imperfections can be sanded and recoated. Larger issues might require stripping the coating and starting over.
Are there any specific brands or types of concrete coatings recommended for DIY? Brands like Rust-Oleum and BEHR offer DIY-friendly products with detailed instructions.
Comments
3 responses to “DIY Concrete Coating: Save Money or Risk Disaster?”
[…] DIY vs professional installation should be considered. Maintenance is essential to preserve longevity & appearance. […]
[…] attempting a DIY epoxy application can be satisfying, choosing to hire professionals offers the advantage of accessing their specialized skills and experience in the industry. This […]
[…] for DIY installation requires a commitment to carefully prepare the floor, apply the epoxy, and wait for it to fully […]