
Considering giving your garage floor a durable, sleek finish? Applying epoxy to garage floor can offer a tough, attractive coating that withstands daily wear and tear. This article guides you through the necessary steps to successfully apply epoxy, ensuring a professional-grade outcome. Expect to uncover the costs, preparation techniques, and application tips to transform your garage with a long-lasting epoxy floor.
Key Takeaways
An epoxy coating on garage floors offers durability, resistance to chemicals and temperature fluctuations, and customizable aesthetics, transforming the space both functionally and visually.
DIY epoxy application can be cost-effective for homeowners skilled in hands-on projects, with preparation steps like thorough cleaning, moisture testing, and surface etching being essential for successful adhesion.
Professional epoxy services are recommended for extensive concrete repairs or when seeking guarantee of quality, as they can potentially offer enhanced longevity and a wider range of decorative options.
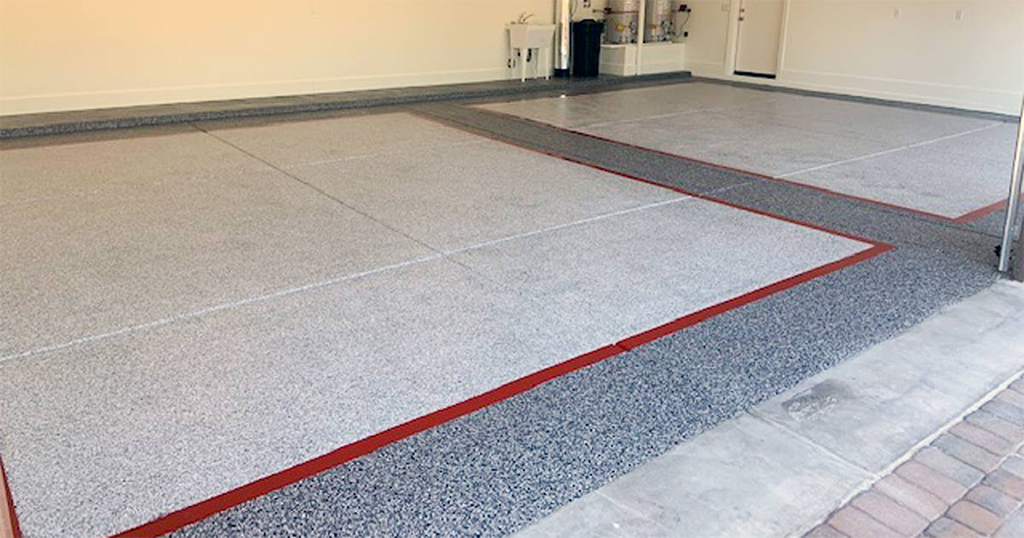
Exploring the Advantages of Epoxy for Garage Floors
Epoxy is a prominent choice for an epoxy garage floor solution due to its exceptional resilience and elegance. Renowned for its superior durability, an epoxy coating is capable of withstanding the rigors of heavy traffic, impacts, and spills that are all too common in a garage environment. Not just a tough exterior, epoxy floors exhibit remarkable resistance to many hazards, including floor coatings, chemicals, gasoline, oil, and heat.
This ensures your floor remains unscathed and reliable for years to come.
But, the merits of epoxy extend beyond its robust nature. The aesthetics of epoxy garage floors can be tailored to your taste, offering an array of colors and finishes that can transform any drab concrete surface into a visually appealing space. Additionally, these floors are adept at handling extreme temperature fluctuations, making them a stable and resilient choice in any climate. With garage floor epoxy, you’re not just investing in a surface that’s built to last; you’re enhancing the overall appeal and functionality of your garage.
Is DIY Epoxy Application Right for You?
Venturing into the DIY realm with a garage floor epoxy project can be both cost-effective and rewarding. For those with a knack for hands-on work, applying epoxy could be a feasible weekend project that won’t break the bank, especially when considering the space of a standard 2-car garage. Opting for a DIY approach could potentially result in significant savings, as expenses range from a mere $2 to $4 per square foot in contrast to the heftier professional application costs of $5 to $10 per square foot.
However, the path of a DIYer isn’t devoid of challenges. From bubbles and cracks to peeling, one must navigate potential pitfalls with meticulous attention to detail. The beauty of a DIY project lies in the empowerment it offers – the ability to craft a space that’s not only durable and chemically resistant but also a testament to your personal craftsmanship. So, if you have the patience and the drive, roll up your sleeves and let’s delve into the preparatory stage, the cornerstone of a successful epoxy application.
Prepping Your Garage Floor for Epoxy
As one embarks on the journey of applying epoxy, the significance of thorough preparation cannot be overstated. – it is the bedrock upon which the success of your project rests. A well-prepped garage floor ensures that the epoxy coating adheres seamlessly and lasts for the long haul. This process involves thorough cleaning, moisture testing, and etching, steps that are crucial for achieving a finish that’s both visually stunning and enduring.
We will now guide you through these essential preparatory steps, that guarantee the integrity and longevity of your epoxy-coated floor.
Cleaning the Concrete Surface
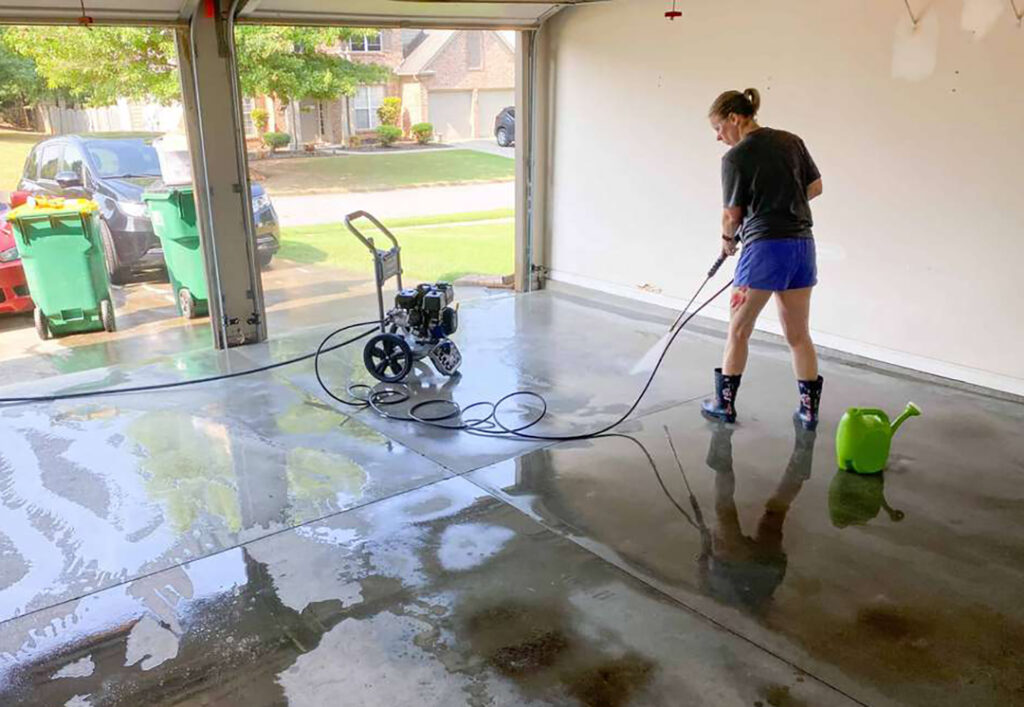
A pristine concrete surface is the starting point for a flawless epoxy application. Freeing the garage floor from dirt, debris, and grease is imperative to ensure the epoxy adheres properly and the finish remains unblemished. Start with the rudimentary yet effective tools – a broom, flat-edge shovel, or metal scraper – to rid the surface of any loose particles, followed by a thorough sweep with a shop vac.
The cleaning stage is not complete without addressing grease and oil. Here’s what you need to do:
Wet the floor.
Apply a degreaser.
Employ a power scrubber or stiff-bristle brush to tackle those stubborn stains, especially near the walls and tight corners.
With the floor degreased, it’s time to attend to any existing paint, glue, or oil spots, as these can impede the effectiveness of the subsequent acid etching step.
Once all preparatory measures are taken, a comprehensive rinse will remove any remaining dust, debris, and cleaning agents, paving the way for a moisture test that could make or break the adhesion of your epoxy coating.
Testing for Moisture with Duct Tape
Before proceeding to the significant task of applying epoxy, it’s crucial to ensure all preconditions for a flawless performance are met. Excessive moisture is an insidious foe that can undermine the bond between the epoxy and your concrete floor. The duct tape test is a simple yet effective method to assess this. Here’s how to do it:
Place a piece of duct tape on the floor, sealing it on all sides.
Leave the tape in place for 24 hours.
After 24 hours, remove the tape and check for moisture.
If you find water droplets upon removing the tape, a sign of moisture presence, the floor demands a water barrier primer.
A dry, clean floor is the canvas you need for your epoxy masterpiece, especially when working with concrete floors. Professionals excel in managing moisture levels, but with careful attention, you can achieve similar precision, setting the stage for a strong bond that resists the tests of time and traffic.
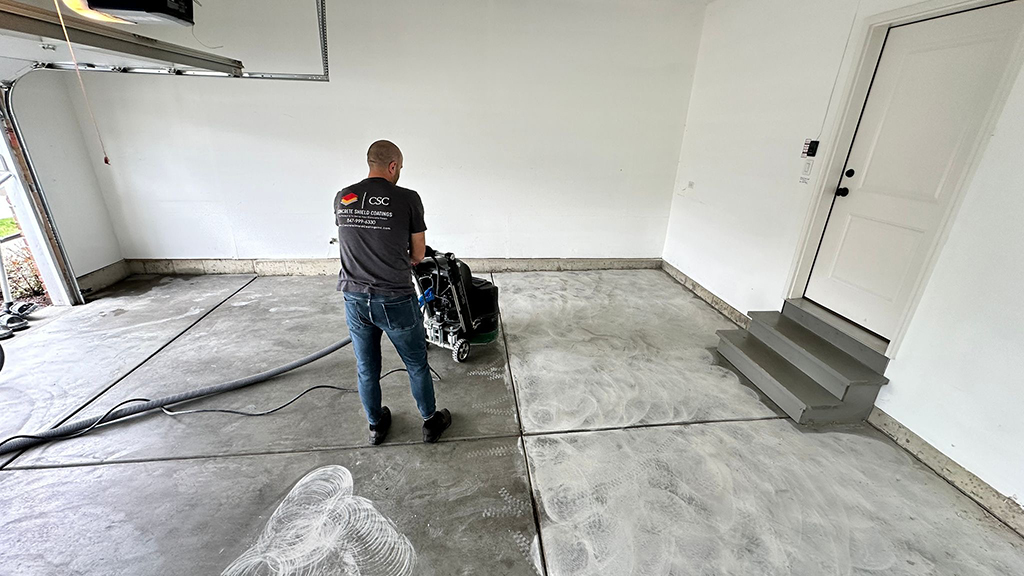
Etching Solutions for Optimal Prep
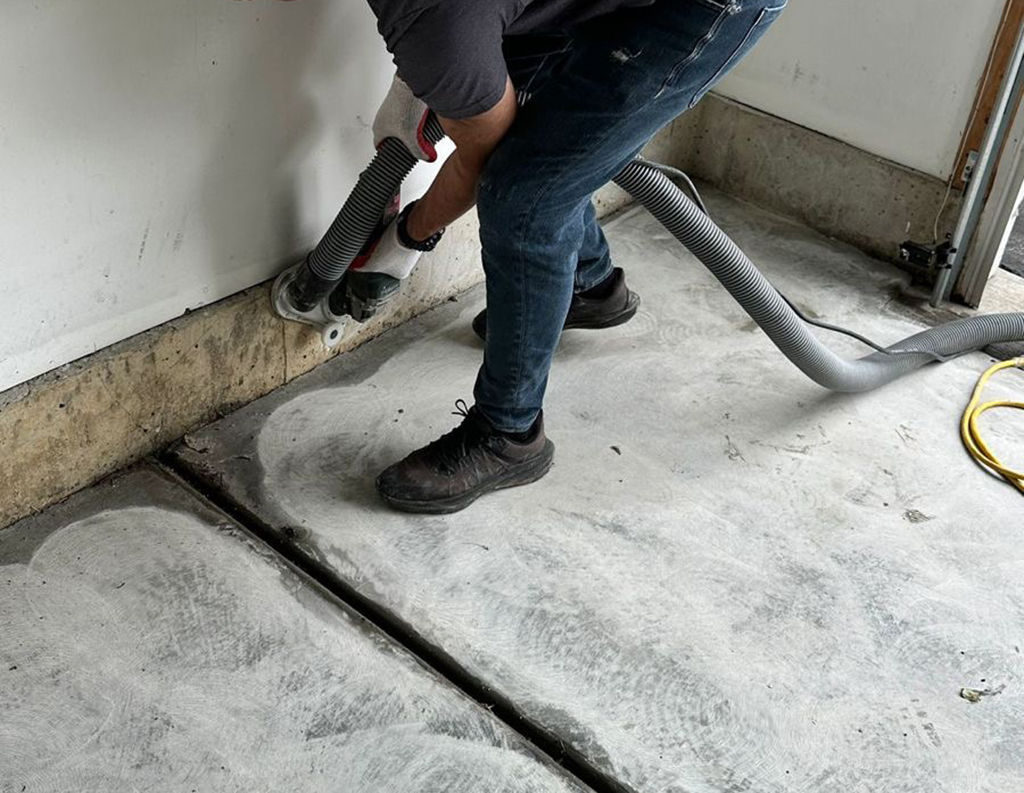
The final touch in prepping your garage floor is etching – an essential process that roughens the surface, ensuring the epoxy clings tenaciously to the concrete. This can be achieved with a specialized etching solution, which, when applied, should be worked into the surface with care. The solution typically needs about 20 to 30 minutes to do its job before a thorough rinse is in order. Be mindful of oil stains that may persist; they’ll need to be addressed as they can resist the etching solution and jeopardize the strong bond you’re aiming for.
With the floor etched, you’re now ready to select the perfect garage floor epoxy kits that meet the unique demands of your garage. It’s a decision that influences the ease of application and the aesthetic outcome of your project, so choose wisely.
Selecting the Right Garage Floor Epoxy Kit
Choosing the right garage floor epoxy kit is a crucial decision. It’s a pivotal decision that dictates both the application process and the final look of your floor. The market offers many options, from solid epoxy to solvent-based and water-based formulations, each with its strengths in adhesion and chemical resistance. While DIY epoxy kits are user-friendly and provide a thinner coating suitable for light to medium traffic, they pale in comparison to the thicker, more durable coatings applied by professionals.
Budget-wise, a DIY epoxy kit for a two-car garage can set you back anywhere between $700 to $1,800. Bear in mind that additional coats of epoxy and other supplies not included in the kit might be necessary. For those pressed for time, rapid-cure epoxy formulations are available, which can expedite the process, enabling vehicle access to the garage in as little as eight hours. Choose a kit that aligns with your budget, time constraints, and performance expectations, and you’ve laid the groundwork for the artistry that comes next – the application of the epoxy coating.
The Art of Applying Epoxy Coating
Applying an epoxy coating is an artful process that requires precision as well as a steady hand. Every step, from mixing the components to laying down the first coat and adding decorative chips, must be performed with careful attention to detail. Achieving a smooth, durable, and attractive finish hinges on your ability to follow the right techniques and use the right tools.
We will now delve into the specifics of applying the epoxy, ensuring your efforts result in a garage floor that’s as robust as it is beautiful.
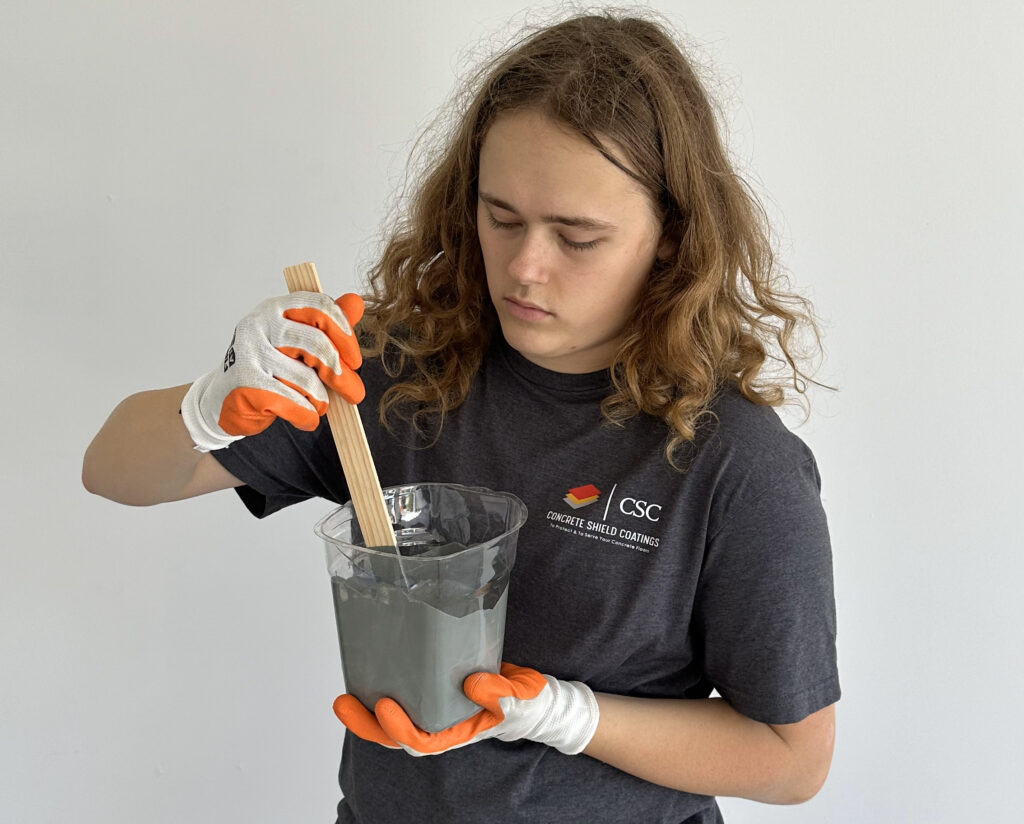
Mixing the Epoxy Components
The alchemy of epoxy lies in the mixing. Combining the resin and hardener in the exact ratio specified by the manufacturer is paramount to the success of your coating. Here’s how to do it:
Start by stirring the resin.
Progressively add the hardener, maintaining a steady stir to ensure a homogenous mixture.
Stir the mixture for no less than 3 minutes. This ensures an even distribution that will translate to a consistent and reliable finish on your floor.
Once mixed, the epoxy must be left to rest for the period indicated in the instructions. This allows for any air bubbles introduced during stirring to rise and escape, preventing defects in the final coating. Patience in this step is key – it’s the calm before the transformative storm of applying the epoxy to your prepared garage floor.
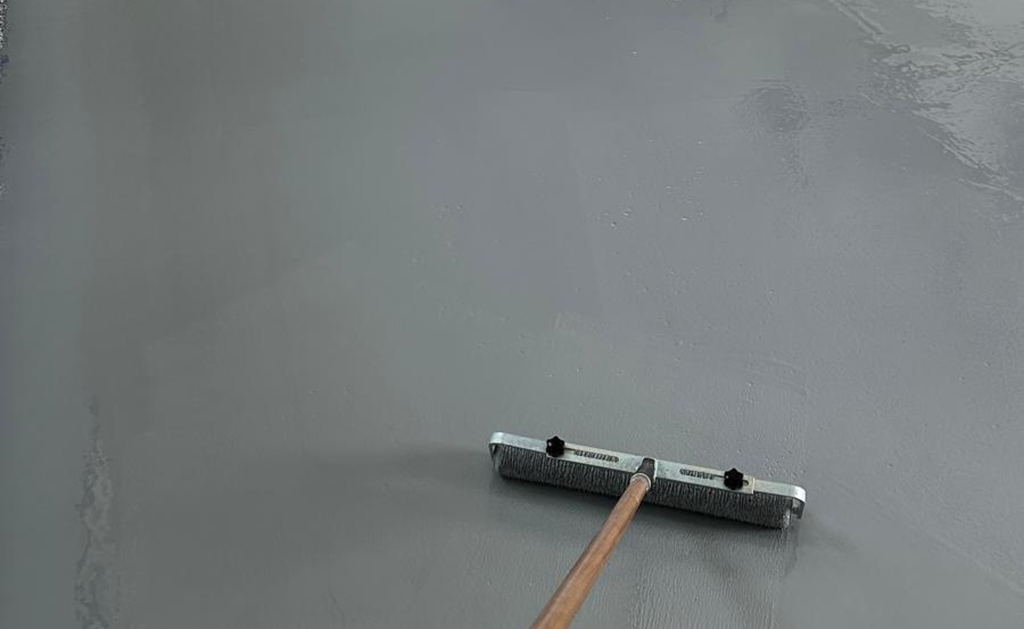
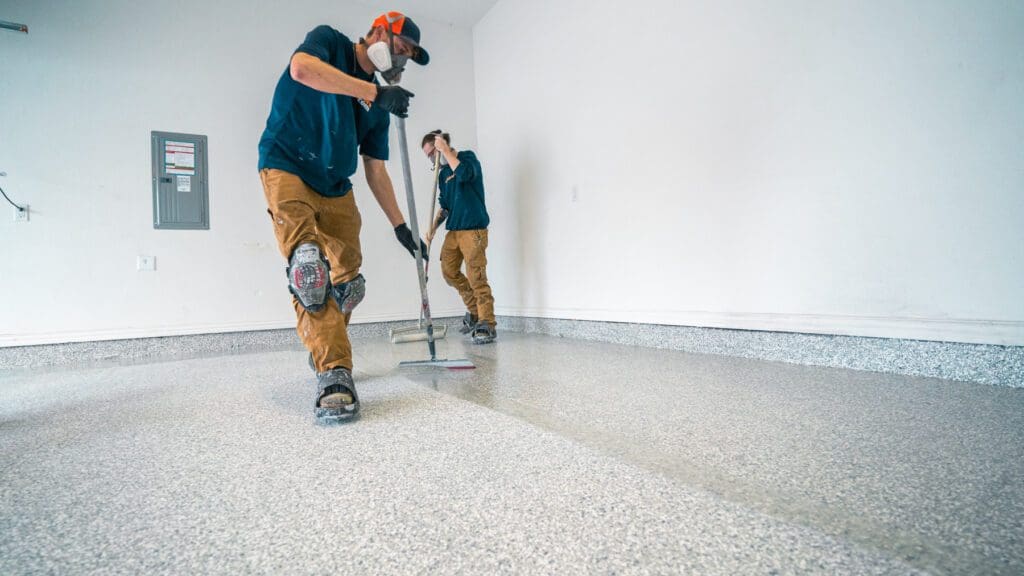
Applying the First Coat of Epoxy
The initial coat of epoxy sets the stage for the quality of the finished floor coating. Here’s how to apply it:
Begin in the furthest corner of the garage and methodically work your way towards the exit, coating 10 by 10-foot sections at a time.
It is crucial to maintain a wet edge as you progress from one section to another, thereby avoiding visible seams and ensuring a seamless surface.
This first layer acts as the foundation for the subsequent coat, so allow it to dry for the recommended 12 to 24 hours before proceeding.
As you apply the epoxy, keep the climate in mind – steer clear of application in cold conditions, and always plan your approach to avoid painting yourself into a corner. After the first coat is down, assess the surface for smoothness and uniformity. Once satisfied, you’re ready to elevate the floor’s aesthetics with decorative paint chips.
Adding Paint Chips for Visual Flair
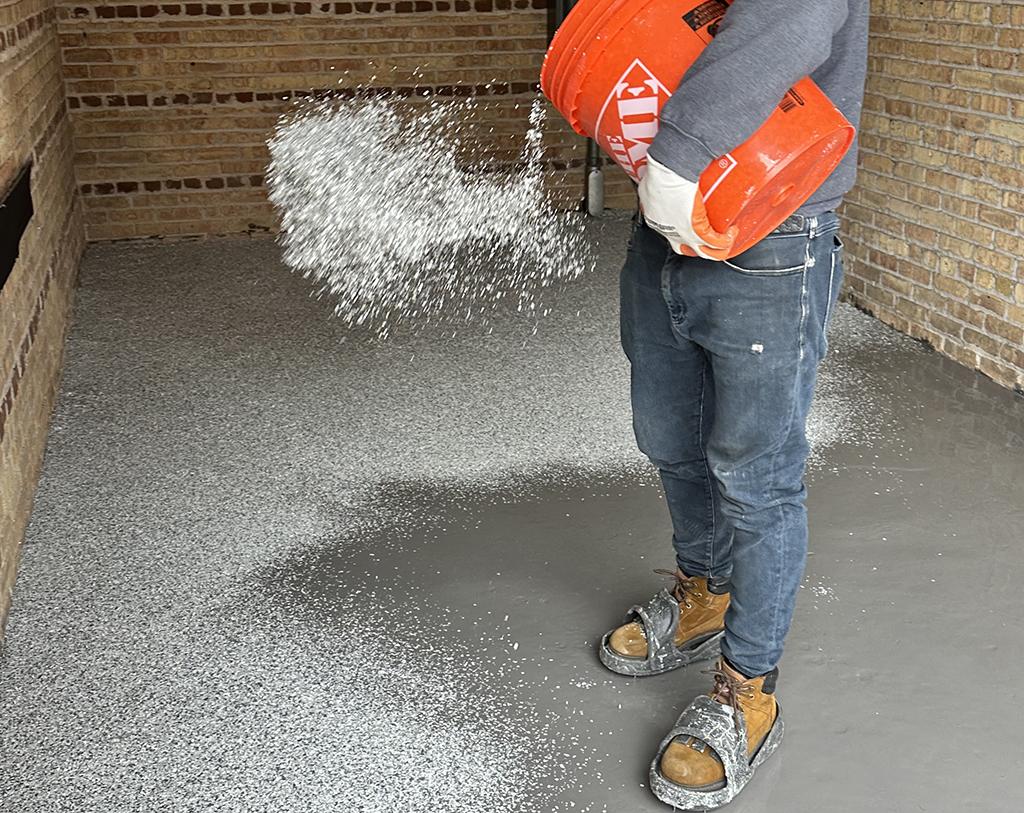
The addition of paint chips is where your creativity can shine, adding both texture and an explosion of color to your epoxy floor. While the epoxy is still wet, cast the paint chips by hand across the surface, ensuring they embed into the coating for a secure hold. This process not only enhances the floor’s appearance but also provides a measure of slip resistance, marrying form and function. Aim for an even distribution of paint chips, taking care to cover the entire floor evenly before the epoxy dries.
After the chips have settled and the epoxy is dry, follow these steps to prepare the floor for the final topcoat:
Remove any excess flakes by scraping them off the surface.
Vacuum the floor to remove any loose debris.
This prepares the floor for the final topcoat, which will lock in the chips and provide a high-gloss finish that is as durable as it is visually striking.
Curing Times and Aftercare
Transforming your garage floor is a journey that extends beyond the application stage, requiring patience during the curing process and diligent aftercare. Most epoxy types need about 12 to 18 hours to become walkable, though some quick-cure options allow foot traffic in about half that time. It’s a waiting game, one where time ensures the epoxy solidifies into a resilient, enduring surface. When it comes to vehicles, however, it’s best to wait at least 72 hours before parking on the freshly coated floor, giving the epoxy ample time to reach a more robust state.
In the week following application, the epoxy achieves full chemical curing, solidifying its strength and chemical resistance. Maintenance is a breeze; routine sweeping and occasional mopping will keep your epoxy floor looking pristine. Vigilance against hot tire pickup and addressing any thinning areas will help prolong the life of the coating, ensuring your garage floor remains in top condition for years to come.
When to Consider Professional Epoxy Installation
Although the DIY approach can be rewarding, there are certain situations where the expertise of a professional epoxy installation becomes necessary. If you’re seeking a guarantee of quality and longevity, professionals can offer solid epoxy coatings that boast lifespans of up to 20 years. Moreover, with a professional touch, the range of aesthetic options widens considerably, allowing access to a spectrum of colors, styles, and textures that may be beyond the scope of DIY kits.
For those who would rather not dive into the demanding task of prepping and applying epoxy, or if the concrete requires extensive repair, professional services offer the assurance that your floor will be in capable hands from start to finish. If your garage’s concrete has seen better days, a professional can deploy specialized products and techniques to ensure a floor well-prepared for epoxy, laying the groundwork for a flawless and enduring finish.
Tailoring Epoxy Floors to Your Garage’s Needs
As an extension of your home, your garage should be a reflection of your unique style and needs. Epoxy floors offer an array of customization options, from the glossy sheen of the finish to the multitude of available colors and decorative chips. Embrace the opportunity to inject your personality into the space, choosing a textured finish with paint chips that not only looks fantastic but also provides a practical, non-slip surface.
For garages exposed to water or areas where slips are a concern, incorporating non-slip additives into the epoxy mixture or using non-slip mats can provide added safety, ensuring that your garage remains a secure environment for all your activities.
By tailoring the epoxy floor to your garage’s specific needs and your personal preferences, you create a space that’s not only functional but also a pleasure to work in and behold.
Cost Analysis: Epoxy Coatings vs. Other Flooring Options
Epoxy coatings stand out as a front-runner for both cost-effectiveness and durability when assessing the long-term value of different flooring options. The initial investment in epoxy flooring might range from $5 to $10 per square foot, depending on the complexity of the design and the conditions of the concrete floor. However, the true advantage of epoxy becomes apparent when considering its longevity and low maintenance costs compared to other flooring types such as vinyl, laminate, or carpet.
Unlike traditional flooring materials that may require frequent replacement or intensive care, epoxy stands the test of time with minimal upkeep, thereby offering an economical solution with low life-cycle costs. Especially for those who opt for a DIY epoxy application, the savings are even more pronounced, making epoxy an attractive option for budget-conscious homeowners who do not wish to sacrifice quality for affordability.
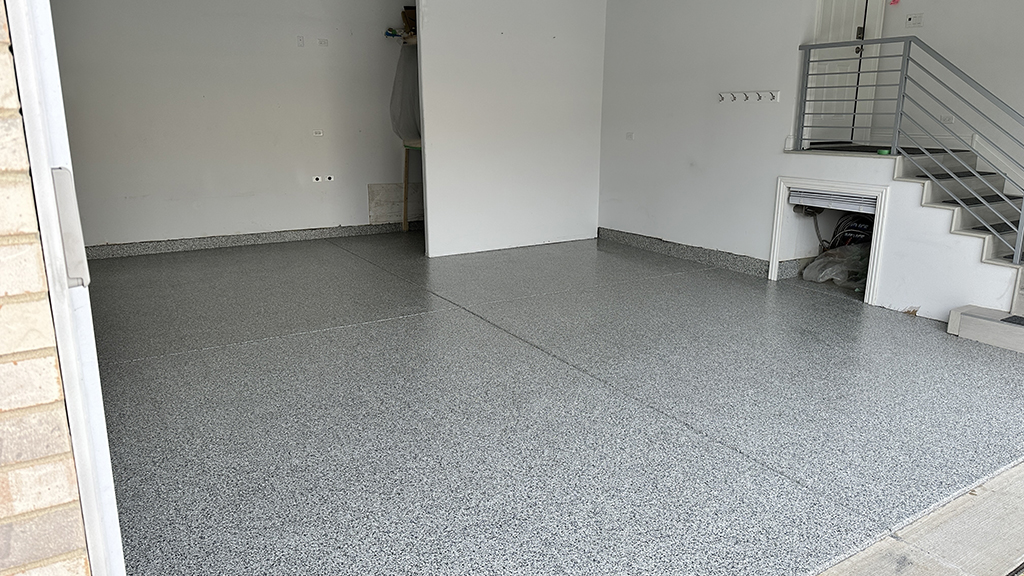
Transforming Your Garage with Epoxy Flooring

Epoxy flooring signifies more than just a surface change; it’s a complete transformation. A well-executed epoxy floor can breathe new life into an aging or stained garage, turning it into a space that rivals a professional showroom. The visual metamorphosis from a dull concrete slab to a vibrant, glossy concrete flooring is nothing short of remarkable. A carefully chosen color palette and strategic use of decorative chips can lead to an aesthetic uplift that energizes the entire space.
But the beauty of epoxy flooring is more than skin deep. Its robust nature allows it to resist oil stains and water damage, while its seamless finish can withstand the heavy foot traffic and rigorous demands of workshop activities. By choosing epoxy, you’re not just upgrading your garage’s appearance; you’re equipping it with a floor that’s as functional as it is striking, ensuring it’s ready for whatever project comes next.
Summary
To encapsulate the journey we’ve embarked upon, epoxy flooring stands out as an unrivaled choice for those seeking to revamp their garage with a floor that is as resilient as it is attractive. From the initial cleaning and preparation to the final touches of paint chips and curing, each step is crucial in achieving a finished floor that not only looks professional but also offers resistance to the daily wear and tear of garage life. Whether you take on the project yourself or enlist the expertise of a professional, the investment in epoxy flooring is sure to enhance the value and functionality of your garage for years to come.
Frequently Asked Questions
How long does an epoxy garage floor last?
An epoxy garage floor can last up to 20 years with proper installation and maintenance, making it a durable and long-lasting flooring option to consider.
Can I apply epoxy to my garage floor by myself?
Yes, you can apply epoxy to your garage floor by yourself, especially if you have experience with home improvement projects and are working on a standard 2-car garage. DIY kits are available and cost-effective if you’re willing to put in the effort.
Is epoxy flooring slippery when wet?
Yes, epoxy flooring can be slippery when wet, but you can make it less so by adding non-slip additives or choosing a textured finish. Using non-slip mats in areas with water exposure can also enhance safety.
How much does it cost to epoxy a garage floor?
Epoxying a garage floor usually costs between $5 to $10 per square foot, depending on factors like the floor’s size, concrete condition, and the type of epoxy used. DIY applications can be cheaper, averaging $2 to $3 per square foot.
Can I park my car on the new epoxy floor immediately after application?
No, it’s best to wait at least 72 hours before parking on a new epoxy floor to ensure the coating is fully durable. Always follow the manufacturer’s guidelines for the specific product.